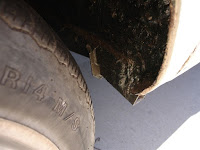
Removed the floor just to see what I was dealing with. While the welding was a shitty job by the previous owner, it has been bloody hard to cut out. Took me most of the day to extract the passenger side and middle section and I am still working on the drivers side.
Looks like I am going to have to replace almost all the metal from the bulkhead forward. There are some parts of the metal that are in ok shape but I figure that while I am cutting and welding I might as well fix it right and so plan to do an order from the local KlassicFab place here in New Zealand. So the money is mounting up with doglegs (both sides), headlight support panel, A Pillar (both sides below the bottom hinge), floor (obviously) nose cone (yeah its a little bit too rough to try and resurrect back to life. For the amount of time and energy required to get it reasonable, it is cheaper and quicker to replace with a new panel).
Looks like I will probably need to also consider replacement of the seat mounting panels on both sides. When the bus had a knock to the nose on the drivers side, it must have been fairly serious as the seat mounting panel is stoved in as well. A bad hammer job to try and fix and, well, best replace. On the passengers side looks like someone has taken a can opener to the side where it mounts to the dog leg. As I said probably best to just replace rather than fart-arse around fixing. I want to do justice to the restoration and rather than do an ok job, I want to make it virtually as good as new again and last another 34 plus years.
Other than this little bit of work, as I have said in my previous blogs, am just waiting on a part to fix my welder. Mind you last week end when I got the air compressor, it wasn't holding the air and while I was checking it out, the regulator snapped off so I am gonna have to replace that piece now before I can get the air cutter going. Just when I am about to start, something else always seems to kick up.
Going to be a big job - there goes plans of having it ready for next summer!! I am probably going to have to build a frame (spinning jenny or similar) so I can flip and get easier access to the sub frame and hard to weld bits. Have to find a set of plans for this though. Hey if anyone out there has a set of plans, would appreciate you contacting me.
Sunday, May 15, 2011
Saturday, April 2, 2011
Walk around movie
Really haven't done anything else, been away on business all week but finally worked out how to upload a couple of videos on YouTube. Shows just how bad some of the rust is in places. The front drivers quarter is pretty messed up, especially underneath where basically the only thing holding its together is the rust. She is pretty crumpled up so I plan to replace all the bent pieces to make it true and straight again. Anyway check them out:
http://www.youtube.com/watch?v=35taH26Ex6g
and
http://www.youtube.com/watch?v=Ifx-EVCSy8U
Sunday, March 13, 2011
Lazy day
Ok so today was really just a slow day just pottering on the bus - am waiting for something to arrive for my welder. So until I get this I am resolved to simply cleaning up the body as much as I can in preparation for cutting rusted tin off and splicing new panels and metal back in place. Also removed a lot of the tinware on the engine and prepping that for primer and paint eventually.
Continued to grind way some of the bondo on the rockers and it was much worse than I though .... swiss cheese completely along the whole rocker. The previous owner had inserted some of sticky gunk and matting inside the rocker and then sealed up with no more nails and bondo'ed over the top. Muppet repair number one.
Spent a couple of hours on the nose and the only thing holding it together was a couple of screws an the bottom, a welding tack in the odd place at the top and a heap of bondo. It is in dire straights and I don't know if I will be able to fix this. Even corrigated iron has less waves in it. Also the surface was not prepared properly and it had a layer of rust over the surface. Muppet repair number two
Roll on next weekend.
Saturday, March 12, 2011
Floor work
Another lazy day working on the Kombi. Decided today to scrape of the floor and see what was underneath the carpet and coat of roughly applied paint. After I removed the carpet found quite a few pieces of extra metal screwed over the rusted holes, mainly where each of the jack points and outriggers secured to the floor.
The long top hat under the bulkhead is completely stuffed and rusted through. Despite sitting in a dry garage since it arrived in New Zealand, it was really moist and rusting away merrily ....... what was it Neil Young said in a song..... yeah that's right, rust never sleeps.
The nose which is sporting a couple of different colours (half original sea blue and the other a shitty cream) has had a bump in a former life and once again a bit of bad cutting, splicing and bondo has disguised a very poor repair ..... why oh why? Anyway I have the complete floor section to put in along with replacement inner and outer valance metal behind the bumper so looks like it will be off with the bottom 8" or so of the nose and dependent on how much re-welding and repair of the nose, I will decide if it will be simpler to do the lot in new metal.
The long top hat under the bulkhead is completely stuffed and rusted through. Despite sitting in a dry garage since it arrived in New Zealand, it was really moist and rusting away merrily ....... what was it Neil Young said in a song..... yeah that's right, rust never sleeps.
Looks like I will need to order in some floor repair sections. Am hoping that these won't be too expensive now that KlassicFab panels are available in New Zealand. While I wait for a few other parts to arrive I will keep on scraping away and looking around at what else needs going - looks like the bottom portion of the B and C pillars will need replacing just to be on the safe side and get a good margin between the current rust surrounding them.
The nose which is sporting a couple of different colours (half original sea blue and the other a shitty cream) has had a bump in a former life and once again a bit of bad cutting, splicing and bondo has disguised a very poor repair ..... why oh why? Anyway I have the complete floor section to put in along with replacement inner and outer valance metal behind the bumper so looks like it will be off with the bottom 8" or so of the nose and dependent on how much re-welding and repair of the nose, I will decide if it will be simpler to do the lot in new metal.
Saturday, March 5, 2011
Not much doing today
Not much really been happening ..... have been a little slow getting going but my book arrived which I purchased online from Amazon. It is the "VW Transporter Owners Workshop Manual". Should prove very useful as I get down to business, especially as I am not really mechanically minded but as I strip things down will definitely come in handy when I pull it all back together. It is gonna take months to do what needs to be done and no matter how much I tell myself that I will remember exactly where every nut and bolt goes, I am sure I will forget and don't want to be left with a box of parts that have no home.
I did have, when I restored my 1969 VW Beetle, another great book "How to keep your Volkswagen Alive"by John Muir but telling myself when I sold the Beetle that I would not be owning another VW, I flicked it on. I should have realised that owning one VW in a lifetime is just not gonna happen.
These are definitely worthwhile having in your reference library.
The motor is out and I have removed the fuel tank, just to clear completely the rear for work. Now that I can have a good look both rear corners are rusted through. Have a couple of corners I purchased from Wolfsberg West but these are slightly different gauge metal, definitely more sturdy and should be solid for many years to come. Will knit these in first and then slide in new metal for the battery tray and drivers side tray.
Will need to fabricate the raised 'lip' for both sides as they are well and truly rusted away. I have seen a few restorations where this piece has been left out and the trays are welded flush with the surrounding chassis. This is ok but its attention to the small details which will pay dividends in the rebuild.
Saturday, February 19, 2011
Engine out .... bondo off
The motor is not original to the bus. Have checked the engine block serial number out and the number begin with AE - so this tells me that it is a 1600cc and was made in the year '71. The engine doesn't turn over at all - hasn't since it arrived and when I turn the key all I can here is the sound of the crickets.... thats right nothing!!.
As I said in an earlier post, not sure what the story is, could be the starter motor so once it is out I will have a decent look at it. Is much easier as the starter is in a difficult place, attached to the bell housing of the transmission. Much easier to have a look over everything while it is out and will give me a chance to replace the shift rod bushings at same time.
Engine looks in good shape externally - all the tinware appears to be in place and in good nick. The heat exchangers however are stuffed..... completely rusted out and hanging loose from the pipes into the manifolds. Will have to replace these as they are beyond repair and although the muffler is ok apart from a bit of surface rust, have decided at same time to replace this.
Ok so the rear corners are rusted completely out and although I don't need to drop the motor to fix it, I want to do a good job so have decided to get the motor out to give me plenty of working room so I can grind away the rotten metal and replace the substitute tin properly.
Although the previous owner modified new metal and put it in with a generous helping of silicone sealer and resin (the resin was still soft and sticky under the bondo - you can see it in the picture), he really only positioned these over the existing rusting metal and the trays were sitting too high. The rust has kept on festering away and I suspect is much worse now that it was way back when. Luckily though it hadn't eaten into the main structure around the engine door opening.
I know that sometimes there may be a need to put a thin, really thin, film of bondo over welding joints to feather out the panels but seriously, there is no place to go heavy handed on the bondo. The previous owner disguised a very bad repair with a half inch of bondo in places.
Saturday, January 29, 2011
Pot of gold at the end of the rainbow!
Who says that Disneyland is the happiest place on earth. When it comes to VW's, this place hands down is the best place - Wolfsberg West in California. It is THE place for VW enthusiasts for all restoration parts.
Took the opportunity to stock up on much need parts while I visited LA. Removed the original rubber from the entire bus as this had hardened over time and was cracked and split. Have replaced most of the external rubber apart from a few rear light seals which I forgot to pick up when in the States. Switched out a few chrome bits that are pitted and dull like the aerial, headlight surrounds and a new set of fried egg blinkers. Will source a new emblem when I look at buying some additional parts..... it is amazing as you start to dig around just how much comes up that needs to be replaced. Years of dirt and grime hide a lot of problems.
Also decided to replace all the pop out window frames and will also add pop outs to the two fixed side windows. I know this is straying from the path of restoring to stock but I have seen a few bus with pop outs all around and safaris and I kinda like the look.
First decent look
Un-packed the van and it came with a few parts to treat the motor with a tune up - had points, distributor cap, spark plugs, leads, vacuum hose and replacements fuel lines, gaskets etc. As well as these have a few other bits and pieces that should come in handy to maybe trade with other VW owners - spare steering wheel, steering box, headlights and a few vw beetle parts - one mans junk is another mans treasure as they say.
The bus was missing the rear seat and managed to track down via theSamba.com a guy who had one. He sent me photos which showed nicely covered seat in original covering and we settled on a price. Just a little pissed off, actually a lot, that when I finally got the bus in New Zealand, the seat that he sent was completely bare of any cover, padding ...... just a rusty frame. This guy trades lots of early bus parts on theSamba.com - thanks a lot for your honesty chump.
Looks like most of the floor supporting structures (both sides rockers, inner rocker panels, every outrigger and jack point) will need to be replaced. Just as well I had ordered the replacement parts from the photos the shippers provided - I beams, Top Hat section, U support, cross member supports, long side panel wheel arches, both rear corners as well as dogs legs, complete front floor (previous owner just did a rough as guts patch job) and have all lower nose cone panel and inner support panel behind front bumper - so virtually replacing the entire lower chassis structure with fresh, clean, new metal.
Some of the repairs are definitely suspect so it is best to do things right from beginning and remove much of the bondo the had been lathered on to hide the repair sins. Once done it should definitely be able to stand up to the magnet test.
Well there is a fair bit of work to do here but I plan to do most of it myself because that is the Kiwi way. I figure what is the worst thing that can happen?..... will have a go and if it is not right then I will take it to the pro's to fix up. No biggie - how else am I going to learn this stuff and besides that is part of the fun owning a Volkswagen.
I also shouted myself a Westfalia 3 bow roof rack. The bus has gotta look good doesn't it? just a little something to top it off.
Subscribe to:
Posts (Atom)